Due to the overwhelming demand please allow a 7-10 business day lead time for your kit to ship out. We are working as fast as we can to keep lead times as fast as possible!
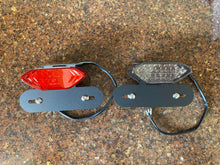
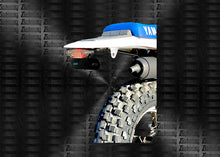
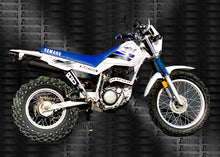
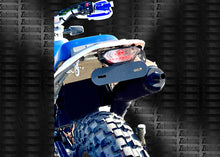
This kit includes the mount as well as an all in one L.E.D. light with bullet connectors already attached. The L.E.D. light has running lights, brake lights, turn signals, and license plate light all in one compact unit. This unit cleans up the rear end of a TW200 tremendously. The bracket is 14 gauge steel powder coated fine texture black.
It has been brought to our attention that people are having issues with hyperflashing. We will be including a new flasher relay that is a plug in replacement for your factory relay. If you already have an aftermarket flasher relay and do not need our relay please e-mail us and we can give you a slight discount on pricing.
Please check with your local DMV/MVD for legality in your state. If you find out that integrated turn signals will not work for you then you can still run our brake light and mount and simply retain your factory turn signals.
Install is very simple as well and anyone can do it.
Step 1- Remove the 2 bolts holding your seat down and remove your seat. Remove the 2 bolts holding down your factory rear fender and remove the cover. And lastly, remove the right side cover that is clipped on. Removing this takes a couple minutes but it is much easier to work when everything is opened up. Plus this gives you a good excuse to wipe down the frame sections that don't get cleaned very often!
Step 2- Find the wires running to your tail light section along the subframe. You will find bullet connectors that simply pull apart. You can use tape and a sharpie to mark which wires go to each individual light(this will speed things up as you install the new light).
Step 3(If you plan on using your factory turn signals skip this step)- Remove your factory turn signals.
Step 4- Remove the 2 bolts holding your factory brake light and plastic housing in place.
Step 5- Using the 2 factory bolts install the Tach Industries Delete Bracket. Now is the time for setting the angle. Do not adjust while on the bike as you will bend the factory tabs and risk snapping them off the subframe. You will notice 2 cut lines in your bracket. These are in place to make final adjustments to angle your light up or down as well as adjust your license plate for those of you that run a sxs tire out back or just prefer a different angle on your plate.
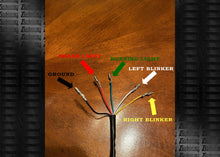
Step 6- Connect each wire from the new L.E.D. tail light to your marked wires from Step 2. You will only use the main ground wire from the brake light not the blinkers(they all tie in together anyways so this will not affect anything). Connect your ground wire first black to black. We have seen different colored wires on different years so just test them by turning your ignition on and plugging in one wire at a time to your marked wires. The light connection setup is yellow- right blinker white- left blinker black- ground(black wire from tw harness) red- brake light green- running light/license plate light. If your bullet connectors seems loose you can take some wire crimps or needle nose and gently pinch them tighter until you get a snug fit. Some of the test bikes needed this and some did not.
Step 7- Pull all the slack from your wiring towards the cover you removed and tuck everything back in nice and tight. You may use zip ties or electrical tape to keep everything together for a cleaner install. Now is your chance to test all your lights before closing everything back up and make sure all your connections are good to go.
Step 8- Put your bike back together and enjoy your new Tach Industries slimmer, brighter, cleaner brake/tail light setup.
Customer Reviews


